Your new Apple Watch is a personal fashion statement that you get to show off everywhere you go. It’s packed with features that make a digital watch look like an antique and makes your life much easier on a daily basis, but one of the most impressive features -- the watch’s bands -- don’t involve technology at all.
Since the Apple Watch bands are removable and replaceable, you’re given a world of options when selecting a style that fits you best. Better yet, you have the ability to change your band as often as you’d like -- that way it matches every single one of your outfits. Your friends and family will wonder how you always look so put-together, but you won’t have to share your secret!
As easy as Apple Watches are to change, it generally takes an Apple Watch owner several days to get used to changing it. To ensure you’re well-prepared when changing your Apple Watch for the first time, we’re going to run you through the various steps involved. Trust us, you’ll get the hang of it quickly!
Before you get started, you’ll want to make sure you have a microfiber cloth to clean the band as you change it. If you’re working on a hard surface, the microfiber cloth will also protect your band from getting scratched.
Other than that, the only thing you’ll need is the new band that you’re replacing the current one with. It’s important that you double check the size of the replacement band to ensure it’s compatible with your Apple Watch. You can confirm this by checking if you have a 38mm, 40mm, 42mm, or 44mm Apple Watch.
Let’s take a look at how to change Apple Watch band the right way.

Removing the Current Apple Watch Band
The first step is to remove the current Apple Watch band. For a first-time user, this is where the confusion begins. The good news is it’s extremely easy once you get the process down.
You’ll need to locate the two band release buttons on the back of the Apple Watch. They’re on the top and bottom of the watch, right where the band meets the watch. These buttons are important because they’re what you press to release the band from the watch.
Start by pressing one of the band release buttons and carefully slide the band out from the watch. You should do this one at a time, since each button only releases that specific side of the band. Once you slide the first one out, do the same to the other side.
If your Apple Watch has a single loop, you’ll follow the same process. The only difference is you’ll be left with one long band instead of two shorter bands. Either way, what you’ll be left with is just the Apple Watch without any bands connected to it. It’ll look a lot like an iPod Shuffle.
Adding the New Apple Watch Band
Once you’re down to just the Apple Watch (and no bands connected to it), you’re ready to transform your watch by adding the replacement band to it. If you found the last process easy to handle, then you’ll have no problem getting through the rest of this.
First, make sure you’re putting the replacement band on the right way. You also want to avoid forcing the band in. You won’t have to push the band release button when sliding it in, but you do need to be careful when sliding it in. When it’s in all the way, you’ll hear a click.
Repeat that for both sides of the watch and voila, you have yourself a newly transformed Apple Watch! It’s always a good idea to practice this a few times to ensure you have the hang of it. It won’t do you any harm and will limit the amount of mistakes made down the road.
Finding a Watch Band That Matches Your Style
Having the ability to change your Apple Watch band gives you the opportunity to make your watch unique to your style. It’s one of the greatest features of every Apple Watch and one of the reasons why it appeals to such a wide range of people.
While most Apple Watches come with a silicone, braided yarn, fluoroelastomer, nylon weave, or stainless steel, we understand not everyone is drawn to those styles. We do, however, know that many people want nothing more than a leather band to go with their Apple Watch.
Apple provides leather bands, but they range from $100-$500 and you aren’t given a whole lot of options to choose from. Unfortunately, that means many fans of leather are forced to settle for something else -- but don’t worry, we’ve got you covered!
Burkley Case Has What You Need!
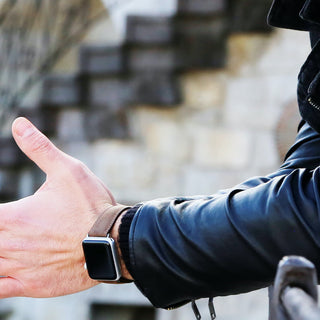
At Burkley Case, we love leather as much as anyone. That’s why we decided to make leather accessories, cases, and watch bands more accessible than ever. For example, our leather Apple Watch bands are half the cost of what you get at Apple -- and we have more options!
Don’t worry, you’re not settling for a lesser quality, either. Our Apple Watch bands are made out of premium full-grain leather -- the best of the best! You can choose from our padded leather, rustic leather, two-tone leather, holo strap, and slim leather options.
Not only that, but the colors range from brown to tan, black, red, blue, pink, and gray. We have a design and color for everyone, that way no fan of leather is left behind! We also stay up-to-date with all the latest Apple Watches, so our bands are compatible with 38mm/40mm and 42mm/44mm models.
When you’re ready to get the most out of your Apple Watch experience, head over to our online store to check out all the latest watch band designs we have to offer! If you have any questions about our hand craftsmanship, the process our watch bands undergo, or more about the company, don’t hesitate to reach out!
Also with the holiday season quickly approaching, now is the perfect time to find a leather gift.


